Environments
An Environment represents a connection between the ACMO Sync Client and a specific ACMO tenant environment.
Environment names are user defined. For example:
DEVUATPRODFinance-UATIntegration-Test
Each environment holds its own set of connections and settings.
Users must enter an environment before viewing or modifying its data flows.
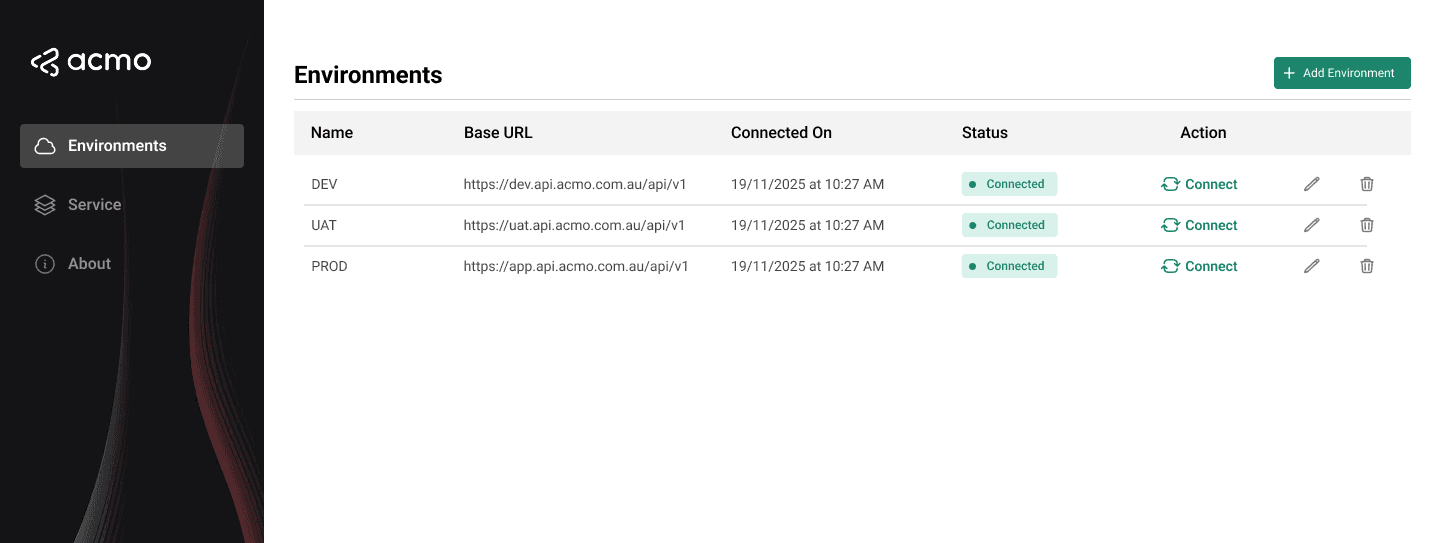
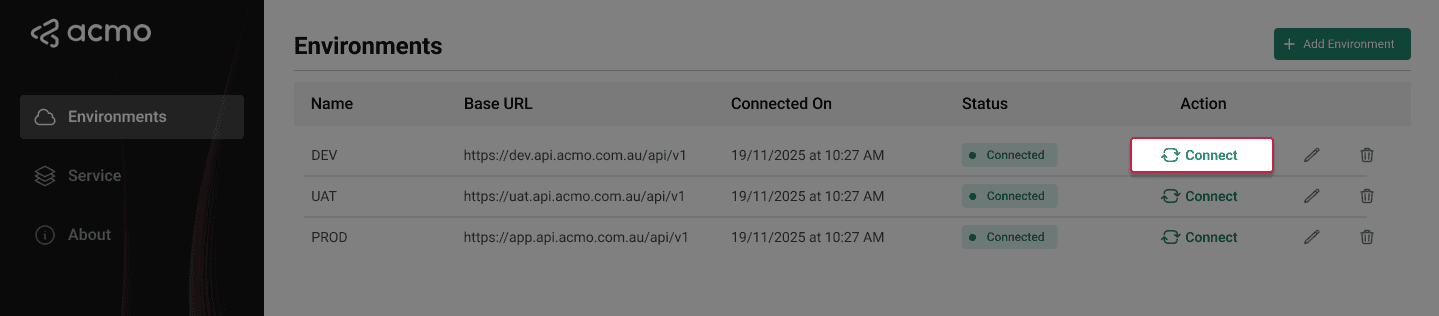
Environments page
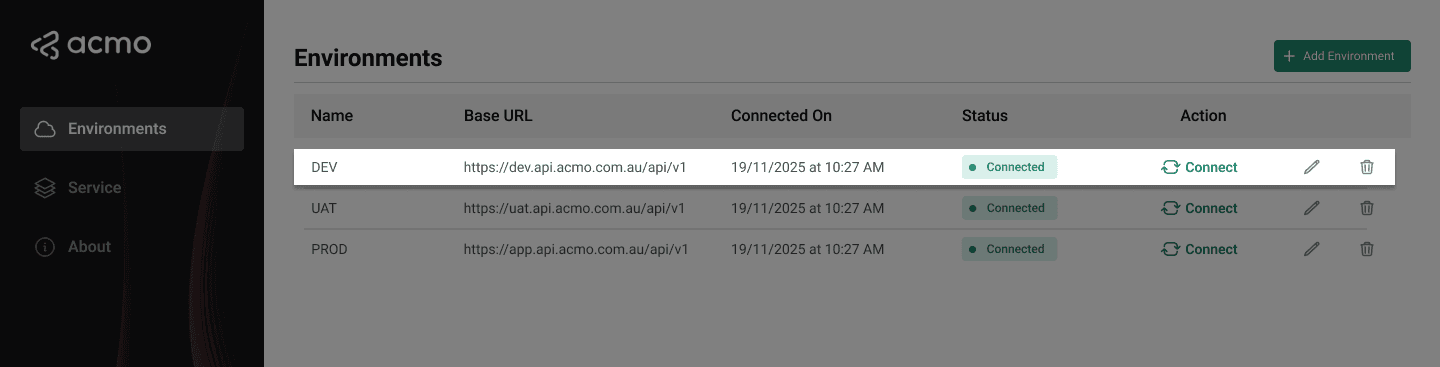
The Environments page is available at the application level and displays all configured environments.
The page typically includes:
-
A table of environments, with columns:
- Environment name
- Base URL
- Last validation status
- Last validation date and time (optional)
-
Row actions:
- Connect
- Edit
- Delete
-
A primary action:
- Add environment
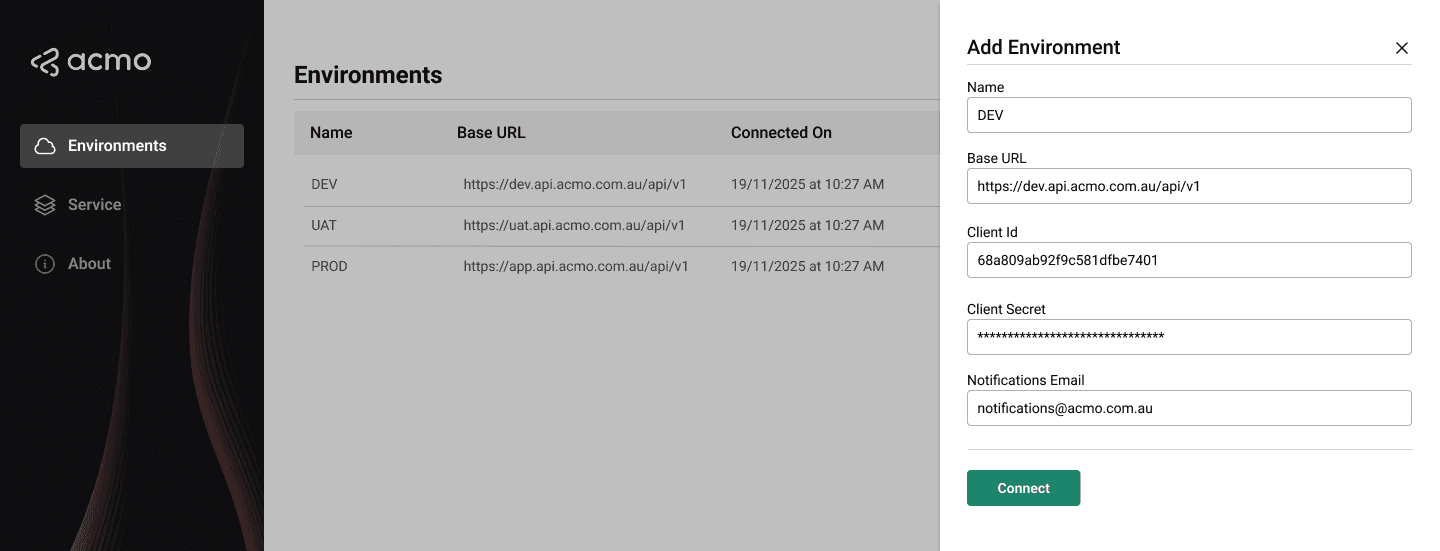
Adding an environment
To add a new environment:
Open the Environments page
Navigate to the environments listing page.
Select Add Anvironment
Click on the “Add Environment” button to add a new environment.

Complete the fields
-
Environment Name
- A descriptive label such as
DEV,UAT,PROD, orFinance-UAT.
- A descriptive label such as
-
Base URL
- The ACMO environment URL, provided by ACMO (for example
https://uat.acmo.com.au).
- The ACMO environment URL, provided by ACMO (for example
-
Client ID
- The client identifier issued for this environment.
-
Client Secret
- The secret associated with the client ID.
- Treated as a sensitive credential.
-
Notifications Email
- Email address where all the notifications will be sent.
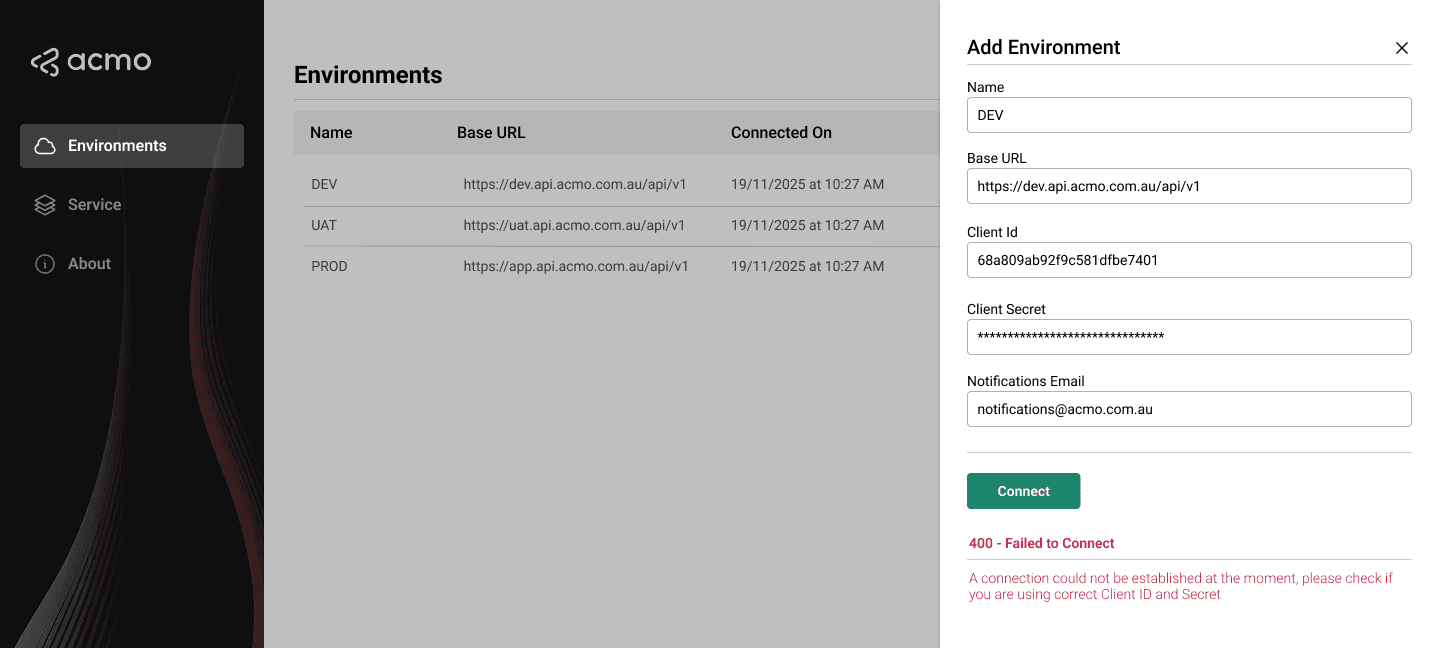
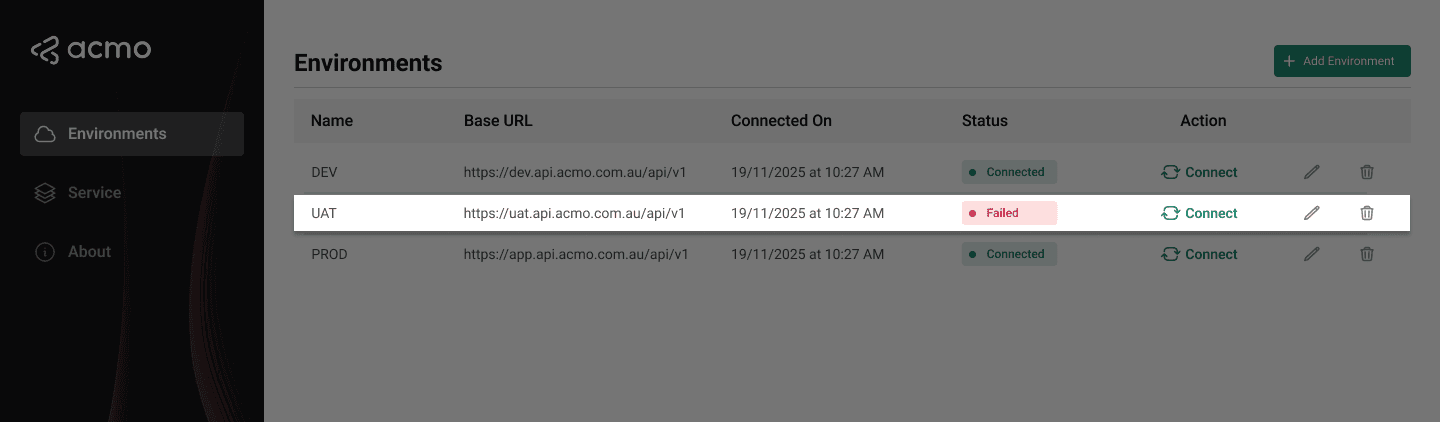
Select Connect
- The Sync Client attempts to connect to ACMO using the supplied details.
- If validation succeeds, a success message is displayed.

- If validation fails, an error message explains the issue so that values can be corrected.
Select Save
After the changes are saved, the new environment will appear in the Environments list.

Editing an environment
To update an existing environment:
Locate the environment
On the Environments page, locate the environment in the table.
Select Edit
Click on the pencil icon to edit the environment.
![]()
Update the required fields
- Environment name
- Base URL
- Client ID
- Client Secret
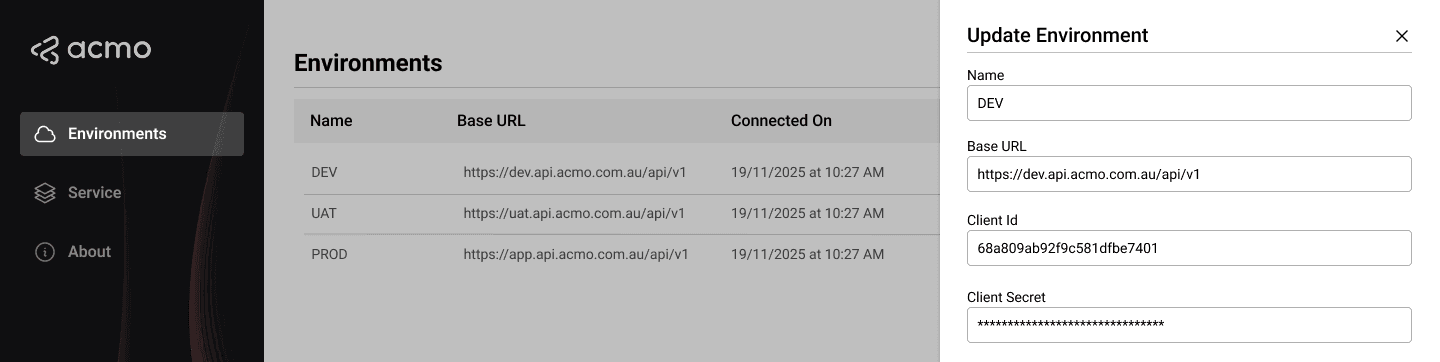
Select Connect
It will validate the Client ID and Client Secret that you provided above.

Select Update
Existing connections for that environment remain associated but will use the new connection details.

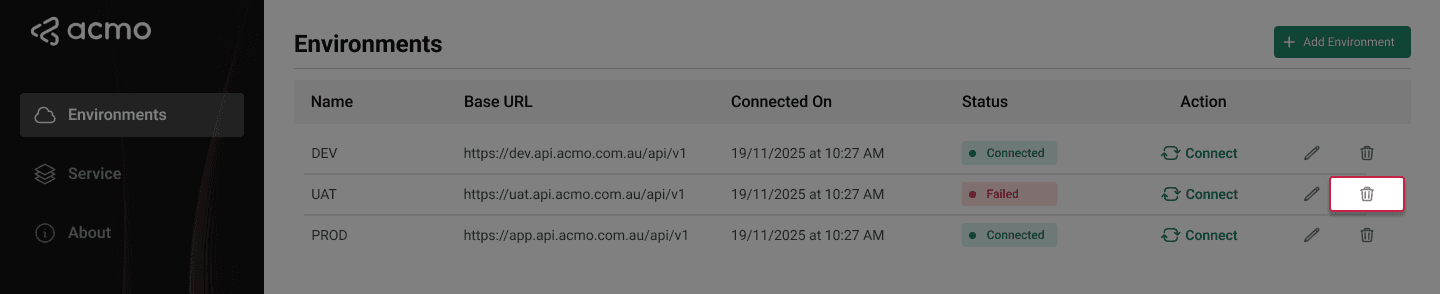
Deleting an environment
To delete an environment:
Locate Environment
On the Environments page, locate the environment that you want to delete.
Select Delete
Click on the Trash icon and a popup should appear.
Confirm when prompted
Click on Delete to confirm deletion of the environment.
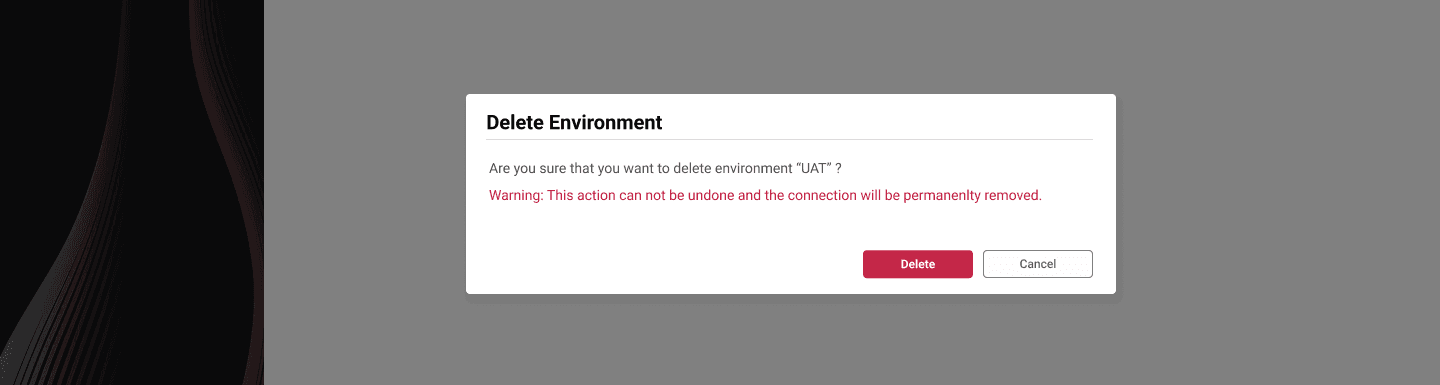
Deleting an environment removes:
- The environment configuration
- All connections associated with that environment from the Sync Client configuration
No files in watched folders are removed from disk; only Sync Client configuration is affected.
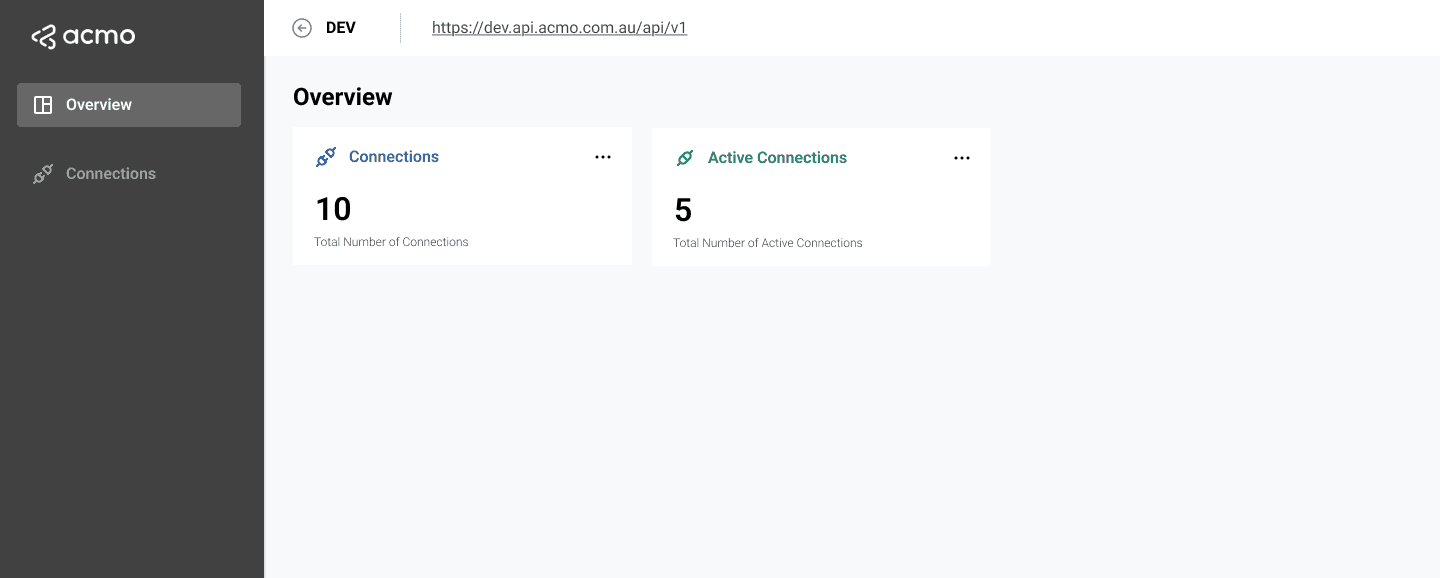
Connecting to an environment
To enter an environment workspace:
Locate Environment
On the Environments page, locate the environment.
Select Connect
Click on Connect to view the environment.
The application will then:
- Display the environment header (name and base URL).
- Show environment-level navigation:
- Overview
- Connections
A Back to environments link allows the user to return to the Environments page at any time.
Once inside an environment, all information displayed (including connections and service configuration) is scoped to that environment.
After at least one environment is created and validated, you can configure connections for that environment.
See Connections for details.